Well, we are in full-on 2nd Birthday preparation mode here and as such, I decided to make a Happy Birthday Bunting type Banner. I was going to colour co-ordinate it with the construction party theme but in the end only used one of the colours so that the banner could co-ordinate with future parties without the need to recreate the complete banner. Although I do love my sewing, it seemed a bit wasteful if I was to make a new banner each year.
Materials:
45cm of 3 different co-ordinating fabrics (bunting base materials)
20cm Felt (for lettering)
4m cord in co-ordinating colour
Co-ordinating thread
Chopstick/turning stick
Masking Tape
Rotary cutter and quilting ruler
Lettering Pattern (Download Here)
Directions:
45cm of 3 different co-ordinating fabrics (bunting base materials)
20cm Felt (for lettering)
4m cord in co-ordinating colour
Co-ordinating thread
Chopstick/turning stick
Masking Tape
Rotary cutter and quilting ruler
Lettering Pattern (Download Here)
Directions:
NOTE: Be sure to read all instructions before proceeding. If you have any questions, I am happy to answer them. Just leave a comment or email me!
1. Fold your 3 pieces of base material in half between the selvedge’s (horizontally).
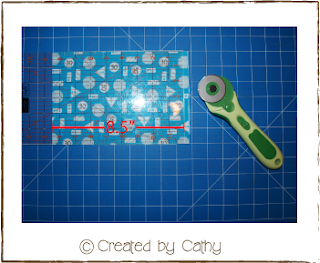
2. Using your rotary cutter, cut along the material in 6” increments. You should get 7 pieces.
3. With the material still folded in half, and measuring from the fold, cut the material to 8.5” tall (unfolded this would be 17”). By keeping the fold, you save yourself a row of stitching!
4. Turn the material in half so that the right sides are facing. You are now getting ready to sew the seams together. You want to stitch from 1” below the folded seam right down the rest of the long side. You then need to sew along the bottom of the fabric leaving a 2” gap – this is the gap through which we will turn the fabric right side out.
5. Trim the corners so that you get lovely corners when the fabric is turned right side out.
6. Through the 2” gap in the bottom seam, turn the fabric through. You may wish to use a chopstick or something similar in the corners to get a nice crisp shape.
Be sure to turn the edges in at the folded edge of the fabric. This gives you the casing to thread the cord through later.
7. Now that the fabric is turned through, we are going to do some top stitching. This gives the flags a nice shape and helps it to sit well when hung.
From the folded edge of the flag, sew a seam 1/4” down.
From the folded edge of the flag, sew a seam 1/4” down.
8. Next you want to sew a seam 1” down from the folded edge of the flag, continuing around the remainder of the flag (as per the picture below).
You now have a completed flag base. Complete steps 4-8 for each of the pieces of fabric.
9. Download the Lettering Template (here). Cut out each of the letters.
NB: Every letter of the phrase ‘Happy Birthday’ is included in the Word Document. You do not need to cut out the letters again if they are repeated. You can reuse the pattern pieces.
NB2: The template is in Microsoft Word Format so that you can add a name or a number (eg 2nd) to the banner, if desired, in the same type. I have used Arial Black in a 350pt type. You could choose a different font if you desire. I chose this font as it is large and quite wide which makes it easier to sew on.
10. Take your piece of felt and pin the letter pattern pieces onto it. Using sharp fine pointed scissors, cut out each letter.
11. Pin the felt letters onto your flags. You need to measure 2.5” from the base of the flag to the base of your letter. For letters that have descenders (the parts of the letter that would be below the line if you were handwriting the letters), you need to measure to the main part of the letter where it would normal sit on a piece of writing paper.
12. Using a co-ordinating thread, sew along the outer edges of the felt letters. I used the zipper foot on my Brother Sewing machine so that I could get as close to the edge with my stitching as possible.
Trim off any loose stitching threads to neaten the flag – now just to thread them together!
13. Using a thin chopstick, or something similar, masking tape the cord to the end so that you can use it like a needle.
14. Thread the chopstick (or similar item) through the casing that we made at the top of the flag (near the folded edge of the fabric).
Repeat with the remaining flags.
15. Your finished Happy Birthday bunting:
15. Your finished Happy Birthday bunting:
If you make this project, I would love to see it! Please email me a photo. I love to see other peoples interpretation of projects!
In the Meantime, don't forget to Keep on Crafting!
Cathy


No comments:
Post a Comment